How to Remove Tile Adhesive From Tiles
When you decide to revamp your kitchen, bathroom, or any other tiled space, one of the most challenging tasks can be removing the stubborn adhesive left behind after pulling up old tiles. This adhesive can be a real nuisance, but fear not, as there are effective methods to tackle this issue. Whether you’re dealing with a small patch or a larger area, knowing how to properly remove tile adhesive from tiles is crucial to achieving a clean and smooth surface for your next tiling project. Also Read Manufacturers of Tile Adhesive, Wall Putty & Epoxy Grout
Tools and Materials Needed
Gather the following tools and materials to effectively remove tile adhesive from tiles. Safety precautions must be observed throughout the process. Before starting, ensure you have proper ventilation and wear protective gear such as gloves, goggles, and a mask to prevent any potential health hazards.
- For this task, you’ll need a few essential items. Begin by acquiring a putty knife or a similar scraping tool to chip away the adhesive gently. A heat gun or hairdryer can also be useful in softening stubborn adhesive for easier removal. Additionally, have a bucket of warm water, dish soap, and a sponge ready to clean the tiles post-adhesive removal.
- When applying these tools, remember to work in small sections to prevent the adhesive from hardening again. Use the putty knife at a low angle to avoid damaging the tiles while effectively scraping off the adhesive. If using a heat gun, maintain a safe distance to avoid overheating the tiles.
- Lastly, clean the tiles thoroughly with the warm soapy water and a sponge to remove any residue.
Preparing the Work Area
- To effectively tackle the task of removing tile adhesive from tiles, the next step involves preparing the work area in a manner that ensures efficiency and safety. Proper work area organization is crucial before starting the adhesive removal process. Begin by clearing the space of any obstacles or debris that could hinder your movement or pose a safety risk. Ensure adequate lighting in the work area to clearly see the tiles and any potential hazards.
- Implement safety precautions by wearing appropriate personal protective equipment such as gloves, safety goggles, and a dust mask to protect yourself from any harmful substances or particles released during the adhesive removal. Additionally, consider laying down a drop cloth or plastic sheeting to protect the floor from adhesive remnants or cleaning solutions.
Mechanical Removal Methods
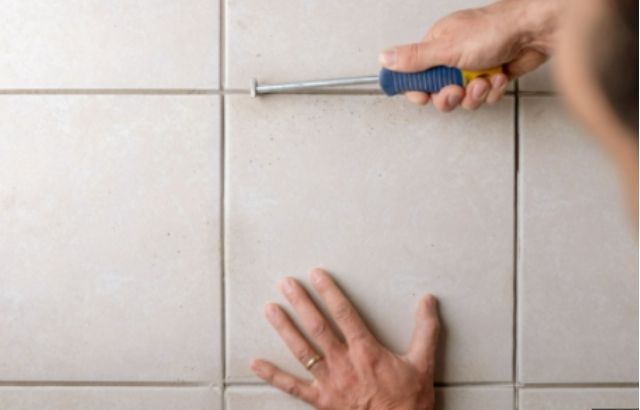
- Consider utilizing a sturdy putty knife or a handheld scraper to effectively begin the process of mechanically removing tile adhesive from tiles. For stubborn adhesive, the heat gun technique can be employed. Start by gently heating the adhesive to soften it, making it easier to scrape off with the putty knife. This method is particularly useful for adhesive that has dried and hardened over time.
- Another mechanical removal method involves using a grinding wheel or a chisel. The grinding wheel can be carefully maneuvered to grind away the adhesive, but caution is needed to prevent damage to the tiles. Alternatively, the chisel approach allows for more precision in targeting specific areas of adhesive for removal. Be sure to work methodically and with controlled force to avoid damaging the tiles underneath.
Chemical Removal Solutions
- For efficient removal of tile adhesive from tiles, explore the effectiveness of chemical solutions designed specifically for this purpose. When using chemical removal solutions, safety precautions are paramount. Always wear appropriate protective gear such as gloves and goggles to prevent skin contact and eye irritation. Work in a well-ventilated area to avoid inhaling fumes, and keep the space dry to prevent slips. Follow the manufacturer’s instructions carefully, as each product may have specific application methods and dwell times.
- When selecting a chemical adhesive remover, consider environmentally friendly alternatives that are biodegradable and less harmful to the ecosystem. Look for products labeled as non-toxic or eco-friendly to minimize environmental impact. Before application, test the chemical solution on a small, inconspicuous area of the tile to ensure compatibility and prevent damage. In case of skin or eye contact, rinse thoroughly with water and seek medical attention if irritation persists. By observing safety protocols and choosing eco-conscious products, you can effectively remove tile adhesive while minimizing risks to yourself and the environment.
Cleaning and Finishing Touches
- Explore methods to ensure a thorough cleaning and achieve a polished finish on the tiles after the adhesive removal process. Once the tile adhesive has been successfully removed, it’s essential to clean the tiles to remove any residue left behind. Begin by wiping the tiles with a damp cloth to eliminate any remaining adhesive particles. Next, use a mild detergent solution and a soft-bristled brush to scrub the tiles gently. Rinse the tiles thoroughly with clean water to ensure all cleaning residue is removed.
- After cleaning, consider employing polishing techniques to restore the surface of the tiles. Depending on the type of tile, you can use a suitable polishing compound or a polishing machine to achieve a shiny finish. Follow the manufacturer’s instructions when applying the polishing compound and use gentle, circular motions to buff the tiles. Once the polishing is complete, allow the tiles to dry completely before using the area. These surface restoration steps will leave your tiles looking clean and polished.
Conclusion
After removing tile adhesive from tiles using mechanical or chemical methods, ensure to clean the surface thoroughly with a damp cloth. This will help remove any remaining residue and prepare the tiles for finishing touches. Once the tiles are clean and free of adhesive, they’ll be ready for any further installation or refinishing work. Make sure to follow safety precautions and proper procedures throughout the removal process for best results.